In this article I will explain how we made our WordPress site hacker proof.
Making a WordPress site hacker proof.
Lots of people use WordPress to create their website. Why not? It is easy to use, comes with a wide range of features, and is familiar to almost everyone who has ever worked with a website. With it being so popular, it comes with the additional risk of being a big target for malware and bots. At the end of 2022, a botnet malware called “GoTrim” targeted self-hosted WordPress sites and attempted to brute force its way into the Administrator account. Not long before that in 2021 the Golang Bot started targeting WordPress sites through a popular Plugin use for GDPR compliance.
The majority of attacks against web applications/web sites target dynamic/interactive functionality offered by the application. This might be a login form, a search box or even an ID number in the URL. Anywhere that a user can interact with the application by submitting data of their choosing is potentially vulnerable to attack. The more dynamic functionality offered by an application, the greater the attack surface of that application. A larger attack surface means more areas to secure, more areas to keep up to date or patched and ultimately means more likelihood of a compromise.
We decided that we wanted to use WordPress for our site, as many others do, but make it immune to attack, by reducing the attack surface to almost nothing. We achieved this by removing all dynamic functionality, by hosting our website as a static site. In doing this, we found that we could host our website more cost effectively than using standard shared hosting. We also found that our website performed faster when we tested it with Google’s PageSpeed Insights analysis tool.
The ingredients for a hack-proof WordPress website
So how did we do it? Let’s start with the ingredients. To make a website work, we need:
- a domain name
- something to build the website on
- somewhere to host the website
- a way of pointing the domain name at the website
We used:
- 123 Reg to register our domain name system-secure.co.uk
- WordPress hosted on Amazon EC2, provided by AWS, though this could be anywhere where we use WordPress to create and edit content, even a laptop
- Amazon S3 to host the static website
- WP2Static plugin for WordPress, to create a set of static HTML, CSS and JavaScript files based on the WordPress site
- WP2Static Amazon S3 plugin to upload our static site content to S3 automatically
- HubSpot for forms the only dynamic content we have – contact us form
- Amazon CloudFront as a CDN and to implement SSL
- Amazon Route 53 to make our domain name point at CloudFront which ultimately points to the static website hosted in the S3 bucket
For those familiar with using AWS it might be easy to work out the process from here. That being said, we will show the steps we took and what we found as we went.
Hosting WordPress and building a static site
We are predominantly using Amazon Web Services for most of this project. As we use AWS for many of our other projects it makes sense to stick with what we know. AWS is very affordable as you only have to pay for what you use, as you use it. As our website is not very resource heavy, this is very cost effective for us. See how to set up an AWS account for yourself if you don’t use this already.
We set up an instance of Ubuntu Linux, hosted on Amazon EC2, which essentially replicates a regular computer in a cloud environment. we chose to use the t2.micro instance type, which due to its small size, fits into the AWS Free Tier, giving us a dev server free of charge, at least for the first year anyway. A partially redacted view of the freshly created instance is shown below.

We installed WordPress onto EC2 and assigned a public IP address. This allows us to log into the WordPress admin panel over the Internet in order to create content like this blog post, manage plugins, etc. This instance of WordPress is used for development/content creation only and is not going to serve the live website to the Internet – this will be handled by S3+CloudFront. Due to this, we can continue to access the WordPress instance via its public IP address and don’t particularly need to assign a domain name at this point.
Using the WP2Static plugin
We built the website using the same tools, features and plugins that anyone else might use. Next we installed and configured the WP2Static plugin to convert the website to static HTML, CSS and JavaScript files.
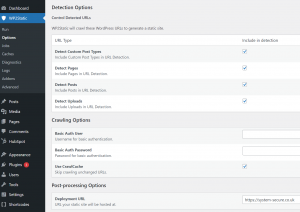
We also installed the WP2Static Amazon S3 plugin that automatically deployed the static files to an Amazon S3 bucket that hosts the site, as well as triggers a CloudFront invalidation, instructing all CloudFront CDN servers globally to retrieve and serve the latest and greatest version of our site. You need to create an IAM Access Key and Secret Key in AWS that has permissions to write to the S3 bucket as well as trigger CloudFront invalidations.
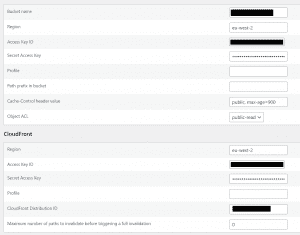
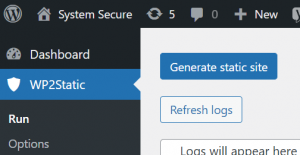
Once all configured correctly, we can simply click “Generate Static Site” within the WP2Static plugin and the plugin will go off and crawl through the published WordPress site, converting each page into raw HTML, CSS and JavaScript. It will also replace the dev URL in all hrefs, img src’s and so on with our deployment URL (https://system-secure.co.uk). The plugin will then automatically upload the files to the S3 bucket and trigger a CloudFront invalidation, instructing all CloudFront endpoints to retrieve an updated copy of the site from the S3 bucket. The site displayed to users when visiting https://system-secure.co.uk will now be updated to match the WordPress dev site.
Potential drawbacks with a static site
There are some sticking points when turning WordPress into a static site. Yes, there is the argument that if we were going to make a static website, why didn’t we just start with HTML and CSS in the first place? The main reason is that using a CMS like WordPress is just quicker and easier. It also offers more features for version control, collaboration, and so on.
The main downside to converting WordPress into a static site is that it limits the interactivity of the site. This is fine for a website like ours, which is essentially an online brochure. This way of working is not suitable for interactive sites like e-commerce, recruitment or forums.
Dealing with interactive features
The main interactivity we need on our website is a way for people to contact us. For this we have opted to use HubSpot’s free online form builder and plugin. The WordPress plugin for this links directly to the HubSpot platform. We created the form within the plugin, that gave us a shortcode to add to different parts of the site. Behind the scenes, the HubSpot form sits within an iframe on our site. This way it is able to offer the interactive functionality of a contact form without our site needing to offer any dynamic functionality (and thereby potential areas of vulnerability) itself.
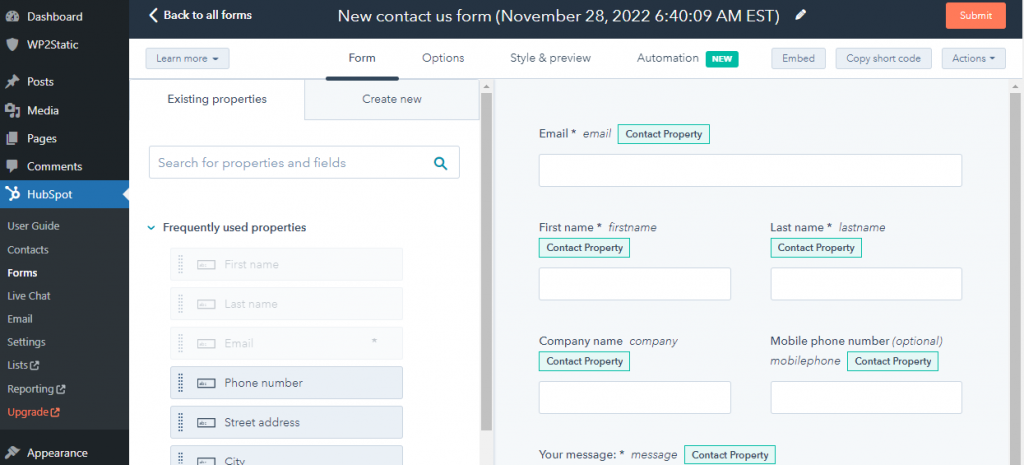
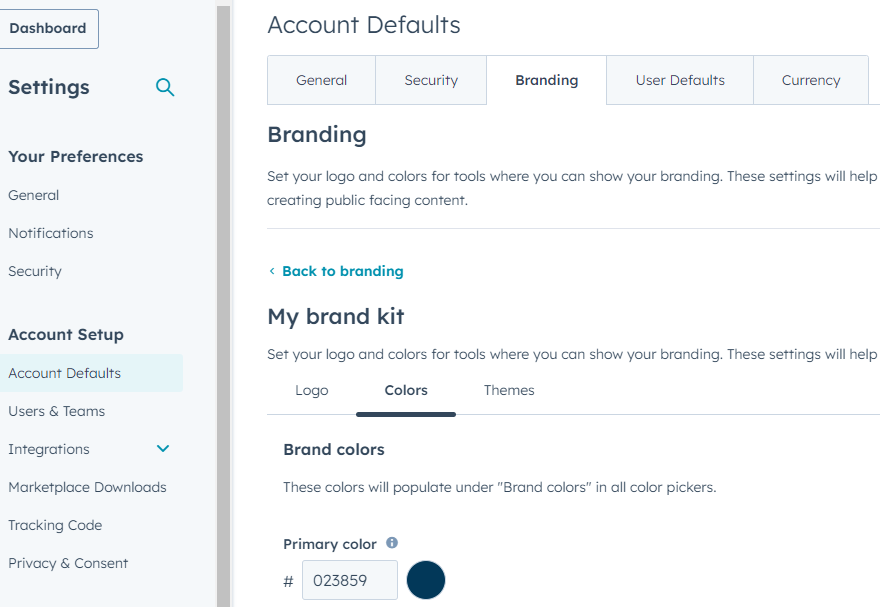
HupSpot will naturally select its own colour scheme for things like buttons. To change this you have to go to the HubSpot platform itself to configure your organisations branding. This will change the colours of the buttons, though if you are using the free version, will leave a small watermark below the Call To Action button that cannot be removed with paying.
Hosting the website

Once ready to publish the WordPress site, we can click on the “Generate static site” in the WP2Static module in WordPress. This converts the entire website into the HTML, CSS and JavaScript files that will display the final website. These files need to be hosted somewhere, so we have opted to store them in an Amazon S3 bucket. We have also installed the additional WP2Static Amazon S3 plugin to send the files to the S3 bucket automatically.
Amazon S3 is essentially online storage for for files and objects, such as the files that make up a webpage. Objects and files are stored buckets, in groups. These buckets can be made private, or can be public for anyone to see.
This works well because you only pay for the storage you use making it quite cost effective. Also, it just happens to be really fast.
Setting up the domain
Now we just need people to be able to find the website.
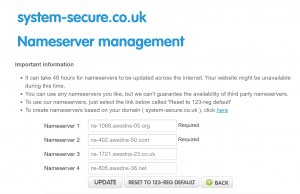
Before we even started building the website, we registered the domain name on 123 Reg. Now we have the website hosted on AWS, all we needed to do was login to the 123 Reg account and configure the domain settings to point at the AWS Nameservers.
We configured Amazon Route 53 in conjunction with Amazon CloudFront to make our domain name point at CloudFront which ultimately points to the static website hosted in the S3 bucket. CloudFront has a strong SSL configuration to encrypt the website and enable HTTPS.
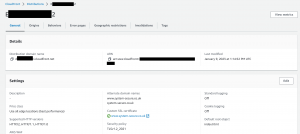
We created a CloudFront distribution as follows:
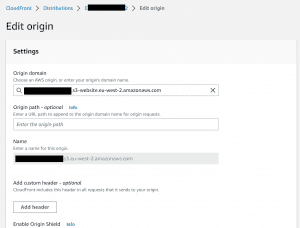
The key part was to set the Origin to our S3 bucket so that CloudFront knew where to pull the static website from:
We could then finally set our A and www DNS records. CNAME records to point to our previously-created CloudFront distribution ID:
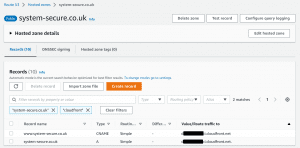
We now have a domain name, pointing at our website files, that are hosted in a separate location to our WordPress CMS. Overall this works out to be quite a low cost and highly secure solution to make our WordPress site hacker proof.
Our findings
We did experience a couple of trial and error problems as we set this up. Initially we didn’t use the WP2Static Amazon S3 add-on and had to manually update the website in Amazon after every update on WordPress.
We also had a problem where we could only see the front page of the website, though diagnosed this as a problem on CloudFront that was easily fixed.
Once the site was live, we did a couple of tests that showed some interesting results. These were all the more impressive as the website was pretty much straight out of the box.
Qualys SSL Server Labs showed the SSL certificates as “A” rated.
Google’s PageSpeed Insights showed the website performed very quickly for desktop devices. The performance was a bit slower for mobile devices, though this was mainly down to the choice of initial graphical imagery used.
Similarly GTmetrix graded the website “B” for performance. This is impressive straight out of the box before we have made any major optimisations.
Migration
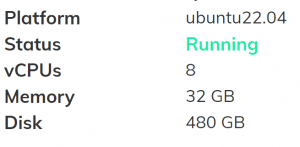
Virtual Private Server specification for approximately $273 for 3 years
Sadly we did experience a few hiccups hosting the WordPress site itself on the Amazon EC2 virtual machine. Ultimate the resource spec on this free service was quite low and occasionally the WordPress site would go down whilst we were editing it. This meant we had to reboot EC2 more often that we would like so we decided to migrate this half of our website to our virtual private server (VPS).
This involved a small amount of configuration. Firstly, we tried to move the WordPress files manually, using “search and replace” to change URLs. This was a mistake and we knew it beforehand but tried anyway. After remembering why we shouldn’t try to move WordPress files manually, we took our own advice and used a plugin.
We installed the All-in-One WP Migration plugin to export from our old EC instance. We then used the same plugin to import the site onto our new VPS. finally in the WP2Static plugin, we had to re-enter the AWS keys to allow WordPress to send the static site to the S3 Bucket, trigger CloudFront invalidations and so on.
Since moving to our own server we’ve never had any performance issues when editing the site.
Summary
The objective was to make the WordPress site hacker proof. It is safe to say that we achieved this goal. The only way to hack our website would be to compromise our Amazon environment. There are no interactive features to be exploited and there is no public wp-login page to crack. If you’re able to prove us otherwise, please get in touch!
Even with performance issues on Amazon’s EC2 instance; the public facing website was always available. It doesn’t take much to occasionally reboot EC2 when editing the site, so this is still a viable option for those with a tight budget.
Overall, a low cost a secure solution for using WordPress.
If you would like to know more or arrange a consultation please get in touch or browse the security services that we offer.